Using The Autoclave
The autoclave uses high pressure and high temperature steam to effectively kill microorganisms or render a biohazardous material inactive. For effective sterilization, the materials/load must be saturated with this steam. Air pockets or insufficient steam supply will prevent decontamination of the biohazardous material.
The potential risks of using an autoclave are heat and steam burns, hot fluid scalds, injuries to hands and arms from the door, or bodily injury in the event of an explosion. Additional injury may be incurred due to the contents of the biohazardous waste such as needle-sticks due to sharps being disposed improperly. Onsite training on how to use the autoclave properly and safely is essential for all new employees to prevent injury. The use of heat-insulating gloves, lab coat and closed shoes will help prevent burns and scalds during loading and unloading. If a load of biohazardous waste is inadequately autoclaved, there is potential for human and environmental exposure to biohazardous materials.
If you have never operated the autoclave you will be using, contact an experienced user in your lab or your Departmental/Building Safety Representative to be shown how to safely operate the autoclave.
Autoclave Safety
Prevent injuries when using the autoclave by observing the following:
Never put volatile chemicals or solvents (alcohols, chloroform), or corrosive chemicals (bleach, acetic acid, formalin, fixed tissues etc.), or radioactive materials in an autoclave. (See below.)
Wear appropriate street clothing including closed-toe shoes and Personal Protective Equipment (PPE) including a lab coat, heat resistant gloves, and eye protection especially when unloading the autoclave.
Don't autoclave sealed containers as they pose an explosion risk.
Never open the door to the autoclave if there is water running out the bottom. Clogged steam lines, equipment malfunction or plugged drains may cause a buildup of scalding water.
Prevent steam burns and shattered glassware by making sure that the pressure in the autoclave chamber is zero and the temperature is at or below 121°C before opening the door at the end of a cycle. Make sure that no personnel, including you, are directly in front of the door.
Be especially careful with liquids due to superheating, a condition that occurs when liquids are at a temperature above their normal boiling point but do not appear to be boiling. In situations where personnel are in a hurry to remove flasks or bottles from the autoclave, the superheated liquids may boil out of their containers or explode.
Items that should not be processed in the autoclave include
Sharps: It is not necessary to autoclave discarded sharps (Used/unused needles and syringes, contaminated broken glass, microscope slides and coverslips, Pasteur pipettes, scalpel or razor blades) prior to disposal. For a pick-up of full sharps containers, fill out the online form at http://www.drs.illinois.edu/sharps/SharpsPickupRequests/Default.aspx.
Hazardous chemicals including items associated with hazardous chemicals. In general, do not autoclave flammable, reactive, corrosive, toxic or radioactive materials. Never autoclave dried bleach or bleach associated materials or nitrocellulose as both compounds pose a fire or explosion risk. Lab coats that have been contaminated with chemicals should not be autoclaved but cleaned by an approved laundry service. To schedule a chemical waste pick-up, fill out the CWM-TRK form online at: http://www.drs.illinois.edu/Resources/ChemicalWasteGuide/CWMTRKForms.
Radioactive materials: Contact the DRS Radiation Safety Program for information on proper disposal of radioactive materials. To schedule a pickup, fill out a Radioactive Waste Pick-up Request available online at: http://www.drs.illinois.edu/Resources/RadioactiveWasteManagement.
Pathological waste includes animal carcasses, tissues and organs and human tissues and organs. University policy requires certain types of pathological waste be disposed of by incineration. For more information on how to dispose of pathological waste for incineration see: http://www.drs.illinois.edu/Waste/BiologicalWaste or via e-mail.
Mixed wastes: If the biological waste also contains hazardous chemicals or radioactive materials, contact the Biological Safety Section via e-mail for assistance.
LMW biotoxins, prions and autoclave resistant materials: Some biohazards (e.g. Low Molecular Weight biotoxins and prions) will not be inactivated by autoclaving as the material is extremely stable. Contact the Biological Safety Section (via e-mail) if you are disposing of these types of materials.
Preparing Materials for Autoclaving
To ensure adequate steam penetration, pack solid materials loosely; don't intentionally compact waste or overfill biohazardous waste bags. Bags/containers should be placed in a large, leak-proof, shallow pan to avoid or contain spills. Non-glass containers are recommended such as stainless steel pans or plastics (i.e. polypropylene, polypropylene copolymer or fluoropolymers) that are capable of being autoclaved repeatedly. Before processing, open the bags/containers so that the steam can penetrate and effectively raise the temperature for adequate killing. A small amount of water may be added to ensure heat transfer inside the bag/container. If the bag is closed during autoclaving, the temperature of the contents may not be raised sufficiently for decontamination. If you are processing more than one tray make sure that there is ample room between the trays so steam circulation is not impaired. Place indicator tape on the bag or add a biological indicator vial to the contents for verification of the decontamination.
Place containers of liquids (bottles, beakers, flasks etc.) covered with a cotton plug or steam-penetrable bung in a large, leak-proof, shallow pan. Inspect the glass to make sure there are no cracks. Do not fill containers to the top but leave plenty of head room. Bottles with narrow necks may boil over violently if filled too full of liquid. Avoid the use of bottles if possible, but if it is necessary, make sure that the screw-cap is nearly unscrewed allowing for pressure changes or it may explode. Water should be added to the pan to help prevent heat shock to the containers. Place the pan and contents in the autoclave and put indicator tape on the containers or add a biological indicator vial to the liquid.
How to Use an Autoclave
The following are basic instructions for autoclave use but do not replace the Manufacturer's Operating Instructions and hands-on training. Before using any autoclave for the first time, read and thoroughly understand the owner's manual because many makes and models have unique characteristics.
Basic Instructions
Place the items to be autoclaved in the chamber.
Check the drain screen to make sure that it is not plugged or obstructed.
Close and seal the autoclave door (see manufacturer's instructions).
On the autoclave keypad select: (For older models that are not computer driven, learn from someone who is familiar with the autoclave.)
- The type of load: gravity (solid items) or liquid
- The sterilization time: The sterilization time will vary according to the contents and how the load is packaged and should be measured after the temperature of the materials reaches 121°C and 15 pounds per square inch (PSI) and can be variable with a minimum of 12-15 minutes. Several trays with large bags or containers loaded in the autoclave will require a longer time to reach 121°C and should be set accordingly.
- The sterilization temperature. Unless specifically instructed, the chamber temperature is usually set to 121°C (250°F).
- A dry cycle if desired,
- Or select a preprogrammed cycle, i.e. the “waste” cycle if your autoclave has this option. Preprogrammed cycles are either entered at the factory or by the autoclave responsible party. Check the manufacturer’s instructions or with your responsible person.
Run. Fill out the autoclave log if this is required.
At the completion of the sterilization cycle, don appropriate PPE. Wear safety glasses, a lab coat with long sleeves, closed-toed shoes and heat-resistant gloves for the following steps:
Open the door slowly and only slightly and allow steam to escape.
Allow items to cool in the autoclave for at least 10 minutes before fully opening the door.
Check the autoclave tape or printed recorder to see if the printed words are clearly visible and the minimum time and temperature were attained on the paper recorder. If not, the load should be re-autoclaved in another autoclave.
After autoclaving, any bag displaying the biohazard symbol must be over bagged with an opaque trash bag and sealed prior to disposal in the regular waste stream. Bags with the biohazard symbol, regardless of use, must not be placed, without over bagging, in the regular waste stream.
Autoclave Tape, Chemical indicators and Biological Indicators
Tape indicators (autoclave tape), can only verify that the autoclave has reached normal operating temperatures. Typically autoclave tape will change from white to words or a pattern following processing. If the temperature-sensitive tape fails to change color, this could indicate that there is a problem with your autoclave. Most chemical indicators change color after being exposed to 121°C, but once again cannot measure the length of time spent at 121°C. Biological indicators such as Geobacillus stearothermophilus spore strips or spore suspension should be used periodically (recommended monthly) to make sure that no biological entity is surviving the autoclave process. See the section on Autoclave Validation for more information.
Autoclaving Biological Waste
Generally recommended parameters for biological waste are sterilization time of 60-120 minutes (excluding exhaust time) and 250°F/121°C at 15 psi. Studies have shown that the processing time necessary to achieve decontamination of biological material depends on several loading factors. Load size, type of container, and moisture content all impact decontamination time. If the waste is packed too tightly or it is a very large load, the length of the sterilization time may need to be increased to allow the steam to penetrate the center of the load. The cycle parameters may require different settings depending on the infectious materials you are trying to decontaminate. The tighter the autoclave is packed, the longer it will take to reach 121°C in the center of the load. To assure that the material you are autoclaving is properly decontaminated/treated (killed or inactivated) calculate the sterilization time for over-kill.
Autoclave Validation
It is recommended that autoclave validation be performed monthly or more often if it is thought that the autoclave is not working properly with BL-2 generated biohazardous waste. A validation log of BL-2 decontaminated waste should be manitained and be available upon request.
In general the validation process involves autoclaving spore vials (heat-resistant bacterium Geobacillus stearothermophilus) inside representative bags of waste, incubating the spore vial according to the manufacturer’s instructions, and determining the results. Spore vials can be purchased from many distributors (see supplies). The assumption is made that if the heat-resistant G. stearothermophilus spores are killed so are the microorganisms in the bag/container.
Steps for autoclave validation
Purchase spore vial(s) and string. Check that the vial hasn’t expired.
Place the vial in the bag of waste near the center of the load. One way to do this without contaminating your hands/arms is to tie a string around the vial and drop the vial down into the center of the waste. If the string is left hanging out of the bag, you can easily remove the vial after autoclaving.
Autoclave waste as usual, and allow it to cool.
Retrieve the vial from the bag of waste.
Allow the vial to cool for at least 10 minutes. Caution: The vial is hot and under pressure. Failure to allow sufficient cooling time may result in an injury if the vial bursts.
Crush the vial in the tool provided by the manufacturer.
Incubate the autoclaved tube and a positive control tube (one that wasn’t autoclaved) in a heat block or incubator at 55°C over night.
The next morning, read the color. If there is growth (as in the positive control) of the G. stearothermophilus the color will change from purple to pink or yellow. If the spores were decontaminated (i.e./killed) the contents of the tube should remain purple or the same as the starting color.
Steps to take if an Autoclave Fails Validation
If validation test results indicate that the autoclave failed to kill the spores, first check the recorder chart to make sure the correct temperature and cycle time were obtained. If the correct time and temperature were achieved in your initial test, and the spore vial results were positive (i.e./growth), you will need to change one or more of these parameters when you re-autoclave:
Time: Increase the cycle time by 15 minutes and insert another vial to do a retest. If your results are positive again, increase the cycle time by 15 minutes increments until the results are negative. Reminder: The cycle time required will vary with the composition of the load.
Density: Load the bag to 75% of the holding capacity or less. Don’t compress waste to fit more in the bag, because steam cannot penetrate completely through densely packed waste bags.
Steam: Add approximately one half cup of water to your dry waste loads to facilitate steam generation.
Loading techniques: You may wish to try changing how you load the autoclave to allow steam to better move from the top of the chamber to the bottom and penetrate the load.
- Place bags in the back of the autoclave rather than in the front of the autoclave, which is the coldest part of the chamber.
- Avoid crowding or stacking.
- Check that the bags are not touching the top or sides of the autoclave as you push the tray inside.
- Try using shallower trays (but make sure the tray will still contain any spills).
If Your Autoclave is not performing as expected
Repair or service can be initiated by calling the building Facilities Manager, your department manager or building safety contact.
Supplies
The following are examples of products found on campus.
Autoclavable Biohazard Bags
Features:
Constructed of material that is safe to autoclave
Color may be red, orange, or clear as long as the international biohazard is prominently displayed.
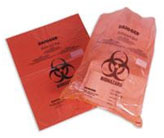
Daigger EF1003E
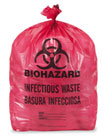
Uline: S-12984
Cardinal: Bio-Check® bag A9500-10
Medvet.com: JOR724
Heat Resistant Gloves
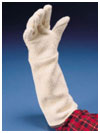
Fisher: 19-013-586
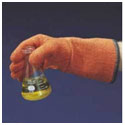
Daigger: EF11022B
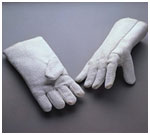
The Lab Depot: Zetex 5760M15
Spore Vials for autoclave and ethylene oxide validation
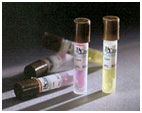
ThermoFisher: BT Sure AY759X1
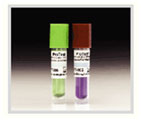
Raven NC9605165
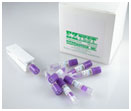
SGM Biotech: EZTest® # EZP/5
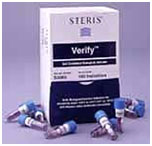
Steris: Verify NC9008896
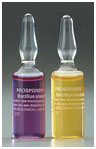
Propper: Prospore@ #12-001-1
Temperature-Sensitive Tape (Autoclave Tape)
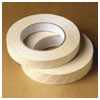
Propper V1-LN-PM-268006
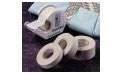
VWR # 36432-188 by Time-Med
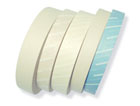
Steris by Browne
Pans/Trays for secondary containment
Features:
Non-glass containers such as stainless steel pans or plastics (i.e. polypropylene)
Sides should be high enough to contain liquids but not excessively high
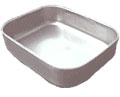
Fisher: Medical Action No:74102
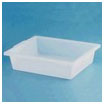
US Plastics: Nalgene 71002
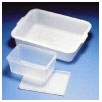
VWR: Bel-Art trays
Waste Containers
Features:
Durable, leak proof container with a lid
Biohazard symbol is displayed prominently. (request stickers from the Biological Safety Section via e-mail)
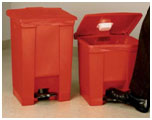
Rubbermaid C18116143R

Sterilite 11368006

Sterilite 44
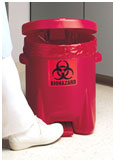
Lab Safety Supply 26578
Autoclave Log
In some buildings an autoclave log is used to monitor usage. If this is a requirement in your building, fill in the autoclave log for each run, noting the date, time, temperature and length of run, your name and your Principal Investigator or lab name. Keep logs next to autoclaves or in an area of the lab that is accessible to all autoclave users. A sample log sheet is available in PDF Format.